 | Hello Guest - Sign In or New Account |
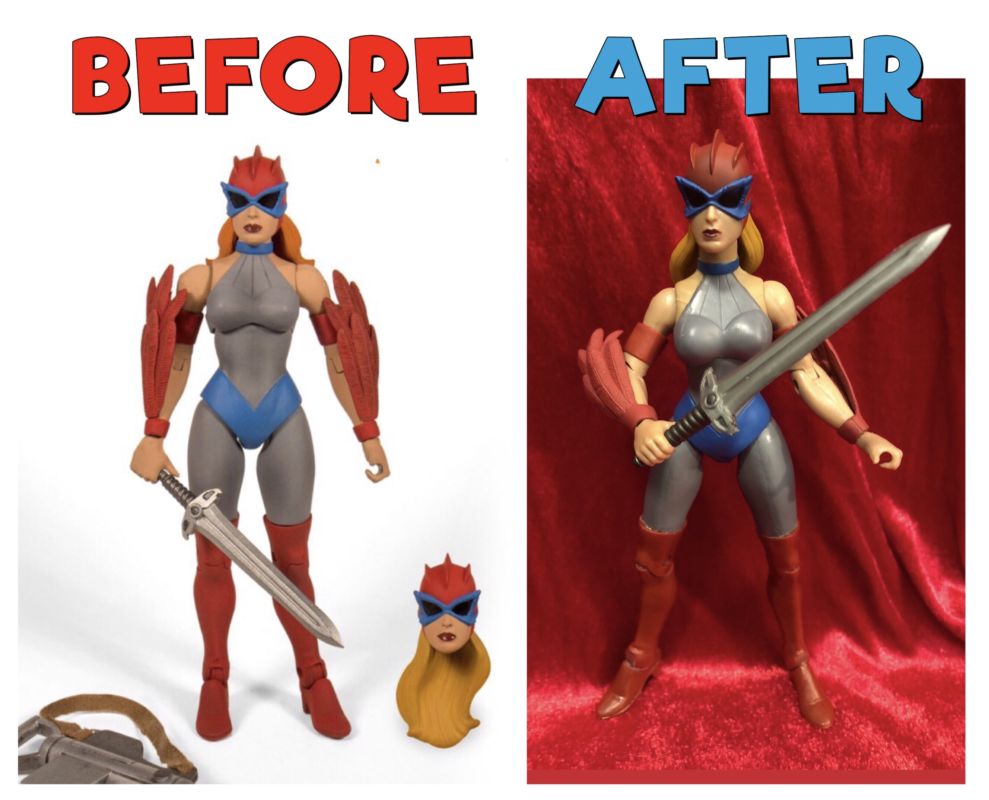
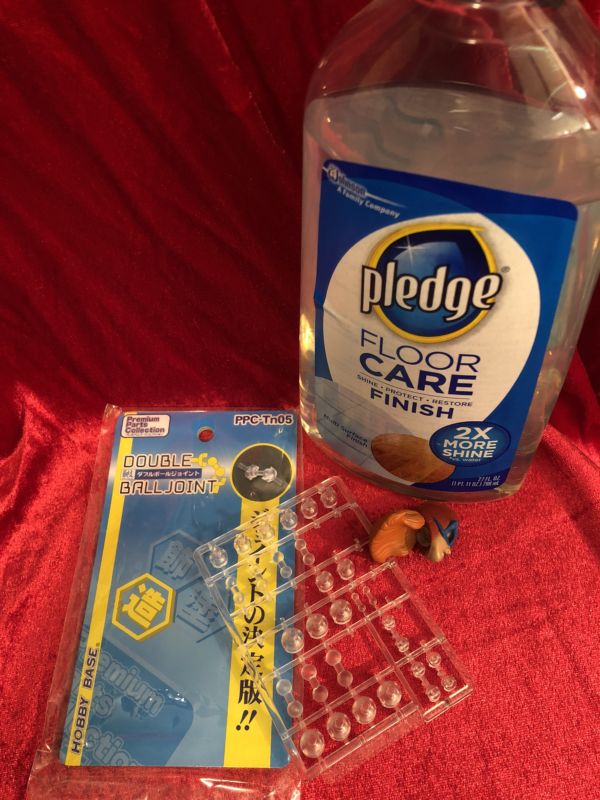
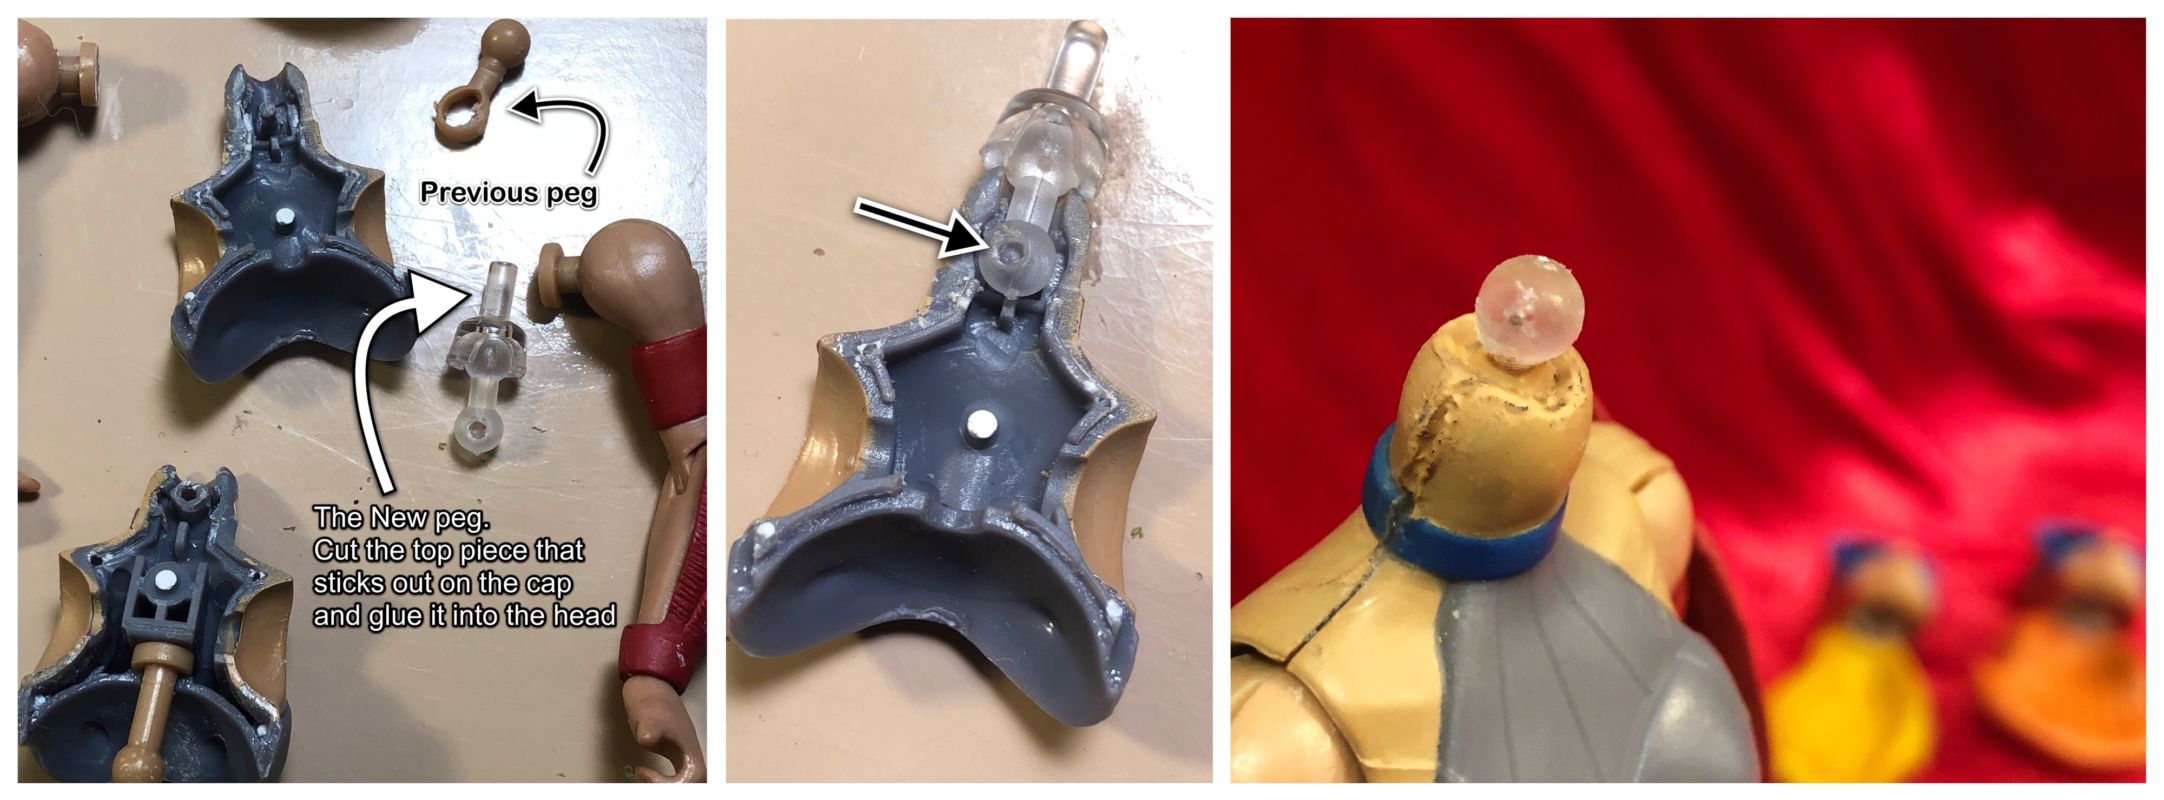
The problems about Hawke –besides the offset design of her buttcheeks. 1.) all of her joints are loose so she’s very “rag doll” –especially at the hips 2.) She has no neck 1st solution: I found a video that shows how to tighten joints by a youtube creator called Wesitron. He applies Floor Care finish with an eye dropper to the joints and I found this works pretty good. 2nd solution: I’ve seen other Hawke purchasers describe online how they corrected the “no neck” problem by applying Tak mounting putty so that her head doesn’t sit directly on her shoulders. I dislike putting Tak in the head sculpt’s peghole. I’d did it once on a different figure and every time I turned the head it was like gum; gunking-up the peg and neck. Not to mention I couldn’t put that particular head on anything else since it, too, was covered in tak. In the case of Hawke I want to preserve the neck articulation. The figure comes with two variants for the head so I want the ability to conveniently pop them off and on. If I could do this over I would do a much better job. This description is so you avoid my first approach and mishaps. I accidentally scratched the paint down the back of the figure while prying it apart. I removed the neck peg and drilled a hole into my new peg. Upon gluing the two upper torso halves back together this new peg stayed secure for a minute and then the inside plastic broke. I redid it and put a paperclip wire through it in hopes to secure it better inside the figure and so it wouldn’t twist. This made it tough to fully close the figure. Notice the space at the seams in the zoomed shot? After this 2nd attempt, the peg twisted and snapped. I finally did what I should have at the start and *NOT* pried apart the figure. I drilled into the neckhole and replacement peg piece. I took a new ball peg and shaved one end so it was straight and not round. I inserted into the hold and glued it in. The end result is what you see in the close-up. I could have done a better by having the peg just a hair lower –however, I didn’t want it pressed so deep that the head wouldn’t snap on well enough. The last and easiest part was gluing the cap piece into the two different heads. I clipped the part sticking out at the top of the cap so it fit in perfect. If I could do it again I’d probably dremel the inside of the head just a little so the cap fit deeper. I had to apply some flesh paint along the neck and back to help camouflage the seams I messed up, as well as cover the scratch on the back, and the marks I made squeezing it with pliers when I glued it closed. If you work with the peg and cap method and don’t bother cracking it open, you’ll do great and I think you’ll appreciate the end result. Sucks when the customer has to put so much time in effort when it should have been the manufacturer’s responsibility.  |
| Star Wars Mara Jade |  | Submission Order |  | Maskarado |
| Detective Kung Fury | | Masters of the Universe Series | | Gilator |
| The Definitive Swamp Thing | | Created by Genuinearticle | | Mary Jane in Spiderman sleeveless t-shirt |
![Hawke [Neck Improvement] (Masters of the Universe) Custom Action Figure](userimages/customs/95500/thumb_95368-1-5add38b620cb1.jpg)

 Update Your Custom
![Hawke [Neck Improvement] (Masters of the Universe) Custom Action Figure [Original with no neck]](userimages/customs/95500/thumb_95368-2-5add38916dac7.jpg)
![Hawke [Neck Improvement] (Masters of the Universe) Custom Action Figure [material you'll need. Ball peg joints you can find on ebay or Amazon]](userimages/customs/95500/thumb_95368-3-5add394395429.jpg)
![Hawke [Neck Improvement] (Masters of the Universe) Custom Action Figure [Ignore the 1st two photos. Those were fails.]](userimages/customs/95500/thumb_95368-4-5add39815c2ea.jpg)